Hello friends. If you’ve ever thought about implementing WordPress version control, now’s the time to start. Perhaps your current workflow of copy production – create staging – make changes – deploy back to production has been trucking along nicely. In fact this has worked so well, you never questioned it, until you came across a major problem or were hired to manage an enterprise application.
Well I’m here to show you the proper WordPress development workflow to manage a commercial site and save your sanity, when something goes horribly wrong- because it will.
Aside from saving your own ass, having a proper workflow setup saves you TIME. Time not trying to debug JS in the console, time not spent figuring out which plugin is clashing with PHP 8.0 and so on. It will also make sure you get paid on time. Because nothing annoys a client more than a $2500 invoice with a miserly explanation of “the code broke.” That client will fight you and drill you for a detailed explanation and possibly try and avoid paying you for several days work.
Introducing transparency
For a long time, web agencies and developers have been either cowboy coding or just creating a staging site to make changes and push WITHOUT version control. It’s easy to see why this happens, because in the majority of cases, it works just fine. But once you land an enterprise application, they will expect a greater level of transparency than you have been offering.
This is very much tied to the fees your are charging to maintain a commercial application versus a small business website. Transparency is also important to save time and prevent the possibility of it recurring.
Enter Version control
The first thing we’re going to do for this client is to setup version control. This means every change made locally is going to be committed to Bitbucket, which will then pipe up to staging. Here’s a workflow of a WordPress CICD workflow, a big shout out to Alexa Green from Toptal who’s article helped me get started on this one:

As you can see, we have several gateways to ensure code quality, and that no code changes are being deployed live to production. As much as her article helped me, there were a few stops missing that I would like to share so here goes.
1. CLONE THE SITE TO LOCAL
For me this means setting up a fresh install of WordPress in my /sites folder, creating a new Database in phpmyadmin and running the famous 5 minute WordPress install.
Now getting a copy of your client’s site and database will depend on the server, but either you can login to their C panel and get a copy of the wp-content folder and the SQL database, or you can SSH into their server if they are using Cloudways/AWS/Kinsta and download the wp-content and database from there. Don’t forget to run find and replace in SQL.
2. CLONE THE REPO
Run git clone into the root directory of your WordPress project. Add the remote in VS Code or add git remote add origin – “https://yourrepo.git”.
You can check the remote is there by running ‘git remote -v’.
Set your upstream to track the remote branch by running git push –set-upstream <remote> <branch>
3. CONNECT BITBUCKET
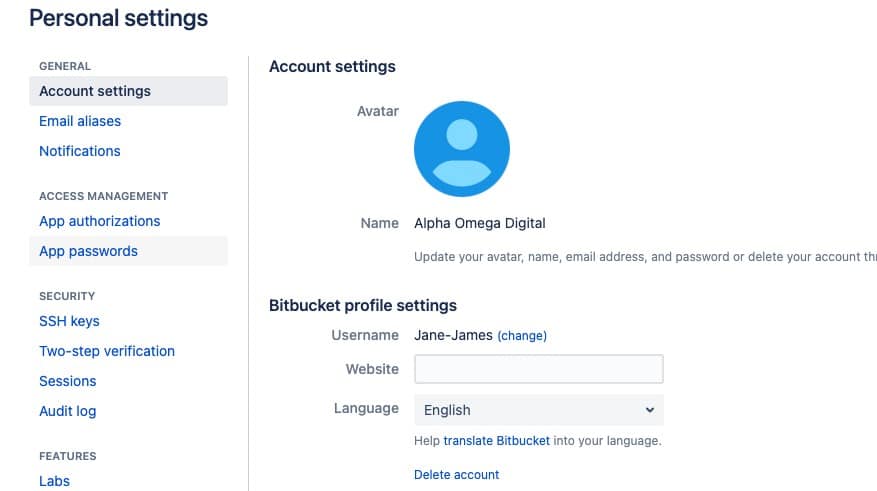
This is the part I got a bit stuck on. Aside from adding the repository URL, VS Code is going to ask you for a username and password. This is NOT your github username and password, which is now no longer accepted as an authorisation. This is the Bitbucket username and app password. You can find this in personal settings, app passwords, create an app password. Add your Bitbucket username to Vscode’s prompt, and the APP password.

4. GIT FETCH
You want to make sure your local version matches remote to make sure to ‘git fetch’ from main/master.
Your local site will not allow fast forward. You will get an error like this:
Updates were rejected because the tip of your current branch is behind
hint: its remote counterpart
This is because localhost doesn’t allow you to fast forward to a remote branch by default. If you wish to fast forward to your remote you need to run ‘git push –force’
5. COMMIT
Now we are ready to make our changes, we are going to create a commit for every change made. Update plugin, commit, push. One line of CSS, commit, push.
This is so if any changes turn out to be breaking changes, they can be easily reversed.
6. REPOSITORY VARIABLES
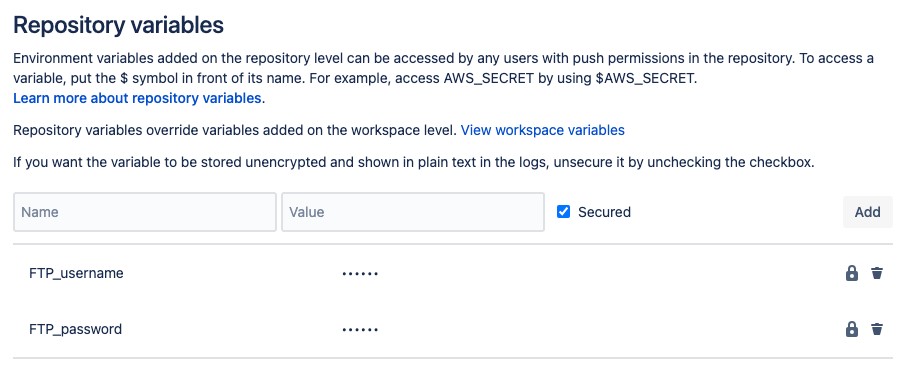
Go into repository, and select pipelines. We’re going to setup a new pipeline. You will need to go to repository variables and save the FTP username and FTP password of the staging site we are pushing to.

7. CONFIGURE PIPELINE
Go to create new, and open your bitbucket-pipelines.yml file. We are going to setup staging to automatic deployment from the repo, and production will be manual. Make sure to use your PHP version in your image.
8. RUN PIPELINE
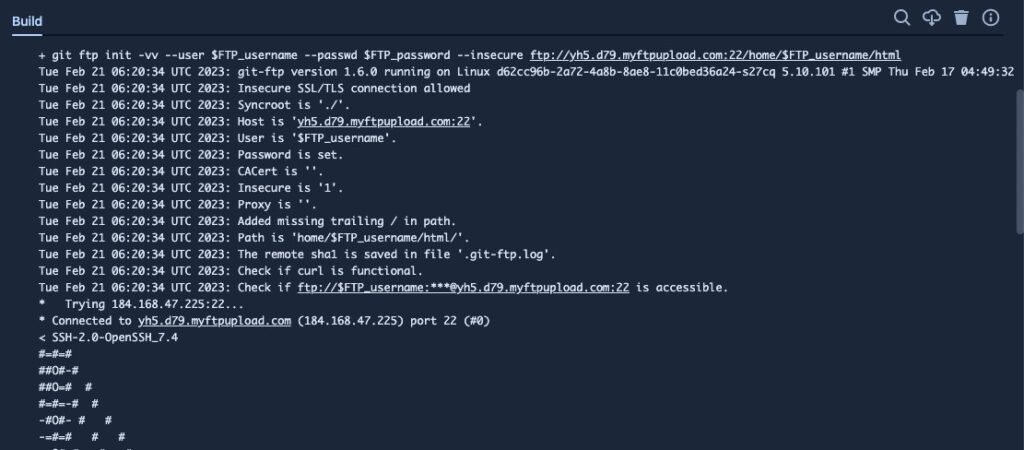
Because we have automatic deployment setup, the pipe is going to run with every new commit to the master branch. How to know your pipe config is correct? You will see the SSH tunnel open up.

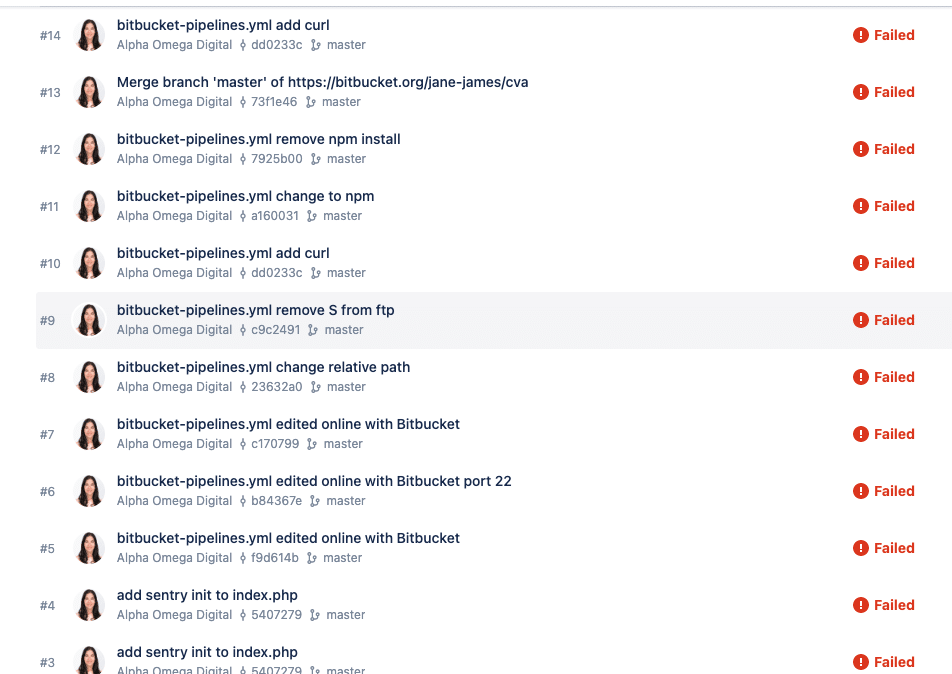
9. PIPELINE FAILED
Oh no! Pipe failed? That’s ok. Check your config and run the pipe again. First check your FTP and username, and then check other variables such as using NPM instead of yarn, or adding trailingslashit. Don’t expect to get it right the first time. This took me a day to get right the first time.

10. SUCCESS!
When the pipeline has run, you will get that sweet ‘successful’ message.
This means your latest commit has deployed to staging and you can now check staging before committing to production. Automatic deployment to staging will save you from doing it manually, every.single.time.

11. OH NO!
Did the work committed to staging cause breaking changes? That’s ok you can undo them. Just go to your local and type ‘git revert commit <commit id>’
This will revert your HEAD back to the commit id you have provided, and undo the changes on staging since we have automatic deployment.
After all, this is what version control is for.
BUT CAN’T I JUST REINSTATE A BACKUP?
You CAN, and it may ‘work’ to get the site backup but you don’t know what caused the problem in the first place.
This means it’s likely to break again. And when it does, and takes more than a day to fix, you are sending your client an invoice for several thousand dollars and no clear explanation as to what happened.
Jane James is a WordPress web developer based in Melbourne, Australia but also services clients from Sydney, Brisbane, Newcastle, Perth, Adelaide, Darwin and Hobart. Have a project in mind? Contact me here.
